Google Experiments In Your WordPress Dashboard
Finally you can easily set up experiments inside WordPress with out having to go through the Google Analytics dashboard, and you don’t have to fiddle around placing javascript all over you site.
Installation
- To use the experiments plugin, you need to have Google Analyticator installed first.
- After you have purchased the Google Analyticator Pro plugin you will receive the download details for the plugin, and a serial number.
- Upload the Google Analyticator Pro plugin to your WordPress site and activate it.
- There will be a new menu item called Google Analytics, with a sub menu called experiments. ( note that the standard Google Analyticator settings have now been moved here)
- Enter your serial number and click Activate Experiments.
Experiments Page
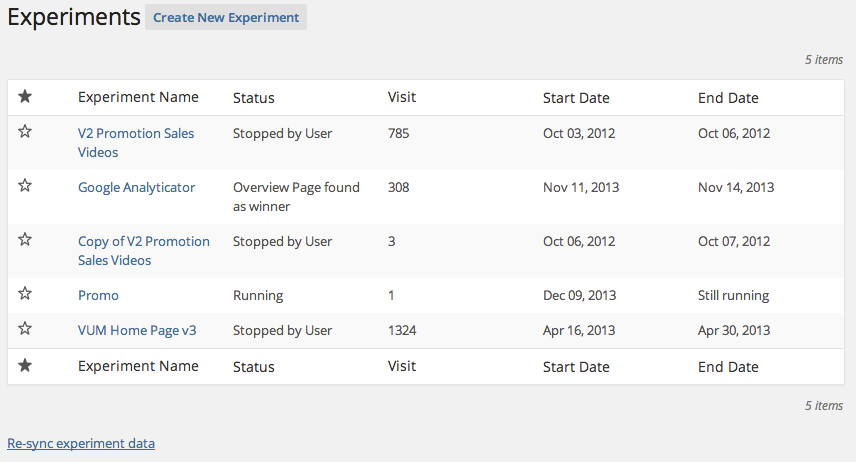
At this point the plugin will now load all your Google Experiments data. This may take a moment, but you will end up with either an empty page, because you have never run and experiment before, or a list of your experiments like this:
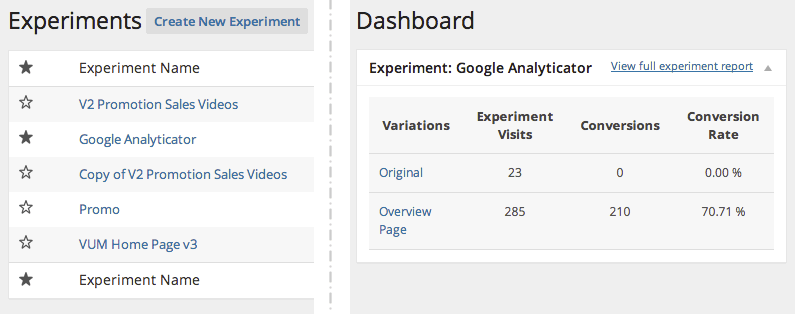
The Star – Dashboard Widget
The star denotes if there is widget on the dashboard to display the experiment or not. Simply click the star if you want the dashboard widget to appear. If you want to remove an experiment from the dashboard, unstar it.
Experiment Name: This is the experiment name in Google Analytics
Status: The current status of the experiment.
Visits: Are the total number of visits to the experiment
Start / End Date: When the experiment started and finished, or if its still running.
Create a New Experiment
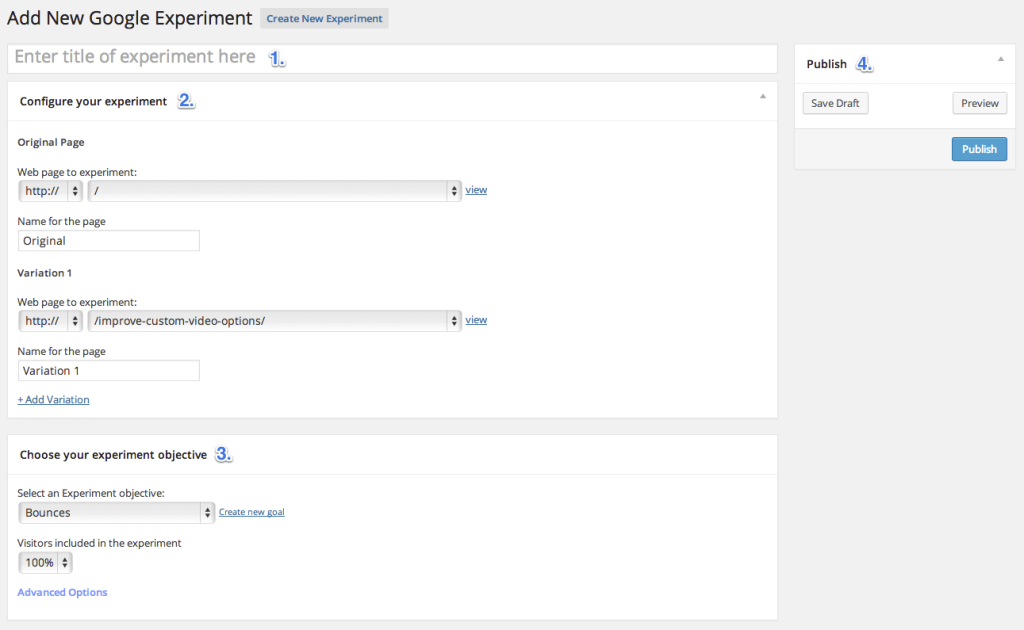
When you create an experiment you will be take to a page which looks like this:
1. Experiment Title
Enter the title of the experiment. This can’t be changed to please choose carefully.
2. Configure Your Experiment
Content experiments work by comparing an original page to a variation. Starting with the original page, choose if you are testing a http or https page. The choose the actual page you want to use as the original from the dropdown. The pages / posts / custom post types will be displayed in the dropdown.
We have ordered them by URL in order to make finding the page you need easier, rather than page title as we are aware that you may being using duplicate page titles. To confirm you have the correct page, you can click view and it will open in a new window.
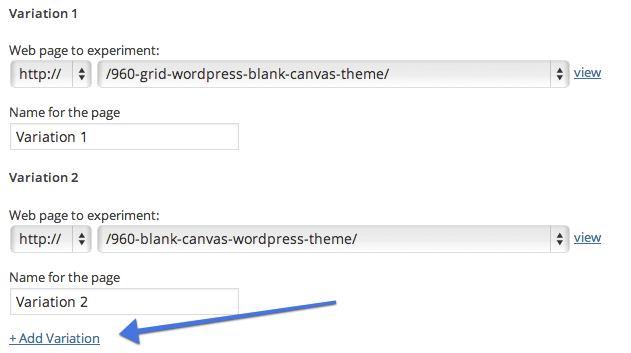
Variations
You then need to choose the variation page for the experiment. You can have up to 5 variations. To add a variation, simply click on the Add variation button.
3. Choose you experiment objectives
If you have never set up an experiment objective before, we highly recommend you read the official Google documentation about it as the options in the plugin are exactly the same as the official options. Select your objective from the dropdown. Notice that we will be displaying your goals as an option in the dropdown.
Currently you can not create goals from inside the plugin, so you will only be able to choose the goals that currently exist in your account. Clicking the create new goal button, takes you to your google analytics account. If you create a new goal inside analytics. You should first save your experiment. Then create your goal in Google Analytics, then go back to the experiments page and click on the Re-sync experiment data link at the bottom of the page.
Advanced Options
The advanced options should only be set if you have experience in running experiments. Again, read the official Google documentation to understand more about the advanced options.
4. Publish
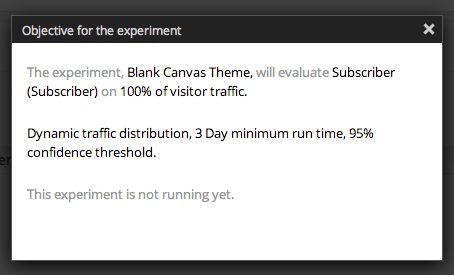
You can either save the experiment and come back to it later (this will not be published). You can also review the experiment, which will give you a overview of the experiment in Plain English.
At this stage make sure you have everything correct with the experiment, because you can’t edit the experiment after it has been published.
Once your happy with your changes click the publish button to publish your experiment.
What Happens Next
At this stage we push your experiment to Google. The plugin then inserts the experiment code on the relevant pages and your experiment is up and running. You will be redirected to the experiments page, and be notified that the experiment is running, and to check back later when you will actually have some data. Its at this point you can add the the experiment to the dashboard if you wish by clicking on the star.
Viewing Your Experiment
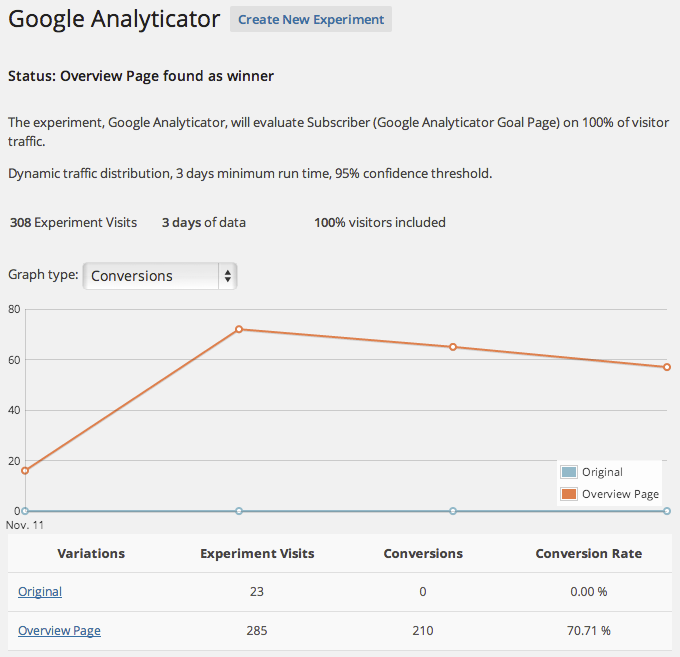
As Google gathers your experiment data you will be able to see how the experiment is progressing on individual experiments page which is accessible from either the dashboard or the clicking on the name of the experiment on the experiments page. You will be presented with an overview of the the experiment:
You can change the graph type to be either: Conversions, Conversion Rate or Experiment Visits. This depends though on the objective of the experiment. You can read more about the meaning of this information from the official Google documentation.
Notes
Cloning Pages
We could have built functionality into the plugin to allow you to clone pages to help you set up experiments, but there is already a brilliant plugin available specifically for that purpose, so we recommend you use the Duplicate Post plugin.
We Obey The Google Analytics Rules
If you have set it up to hide analytics tracking for certain roles, for example admins, then the experiment code will not appear on those pages either.
SEO Ranking
We have followed the official Google instructions about experiments and SEO which you can read more about in the official Google document. While an experiment is running, we override the WordPress canonical function to make sure that the variations point to the original page. If you are using the WordPress SEO Plugin by Yoast, we also override that canonical for your variation pages. It is important to note though that we only do this while the experiment is running. After the experiment is complete its up to you to remove / modify the variation pages.


